I have been wanting to test out a CGM (Continuous Glucose Monitor) ever since these came onto the market.
These are simple devices that attached to your arm – yes there is a small needed – and yes it looks larger and more menacing than it is!!
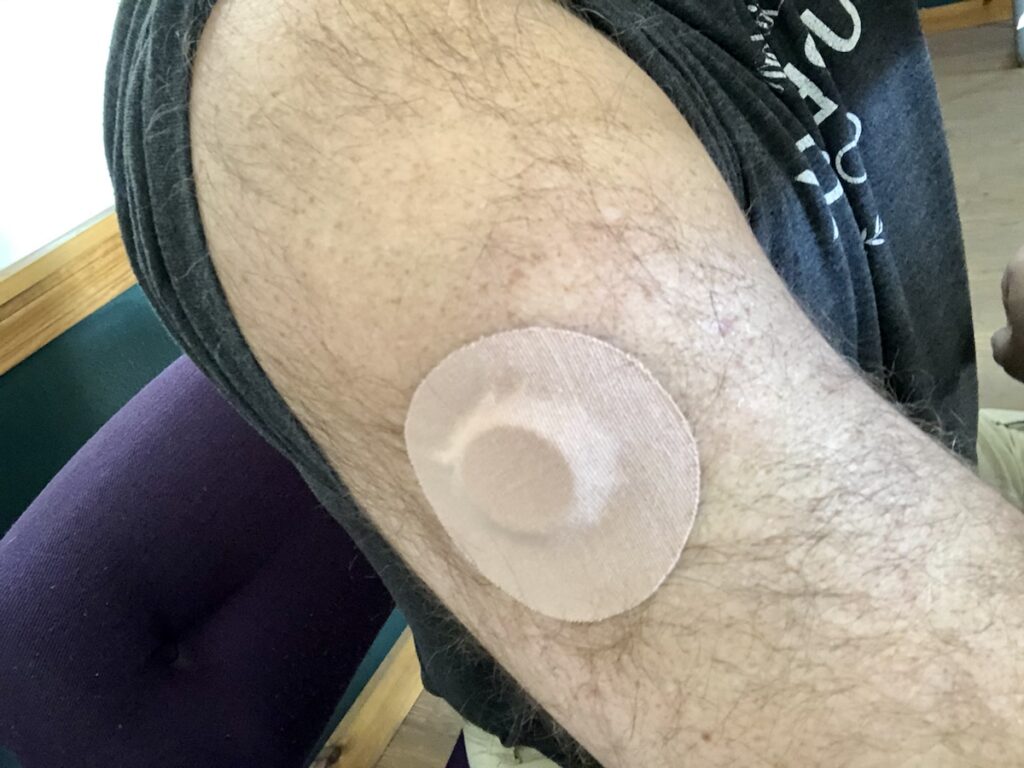
I’m not diabetic, I really just wanted to see how my body reacted to certain types of foods.
You’ve heard of the Glycemic Index? If not, in short it is how your body reacts to the sugar in a food. As you can imagine, your body will react differently to honey versus oatmeal.
While they are both forms of carbohydrates, your body can process the honey immediately, while the oatmeal needs to be broken down.
At the next level, sticking with oatmeal, your body will process the oatmeal differently depending on how the oatmeal was processed. For example: The body processes quick oats, rolled oats, and steel cut oats quite differently. The more “processed” the food the easier it is for the body to break it down most times.
Now here is where the CGM comes in!
Everyone processes sugar differently. The glycemic index is actually just an average. That means that some people will process oatmeal as if it was sugar and others it will barely affect them.
I’ve been finding myself in a weight stall so wanted to be more accountable to myself and also experiment to find out if some of the “healthy” foods I have been eating are maybe not so great for my body.
So starts the experiment!
Day 1
Time to install the device. You take it out of the package and put it into the applicator. It didn’t come with really any instructions in the box, but links to videos to watch. Those were helpful. As soon as I attached the device to the applicator there was a giant (relative to what I was expecting) needle!
My first thought was: No way in hell I’m sticking that into my arm!
My arm was already swabbed and I figured just GO FOR IT.
So in the arm it went.
…
I didn’t feel a thing. Nada. All that concern for nothing. Just pretend the needle isn’t there, you really won’t feel it.
Activate your sensor!
The instructions where not clear on this one. I had the device on for a few hours and couldn’t figure out why I didn’t have data on the app yet. Did some more digging to find out the sensor needed to be activated via the app. Then wait a half hour or more and then you can sync the data.
Eventually the data starting coming in
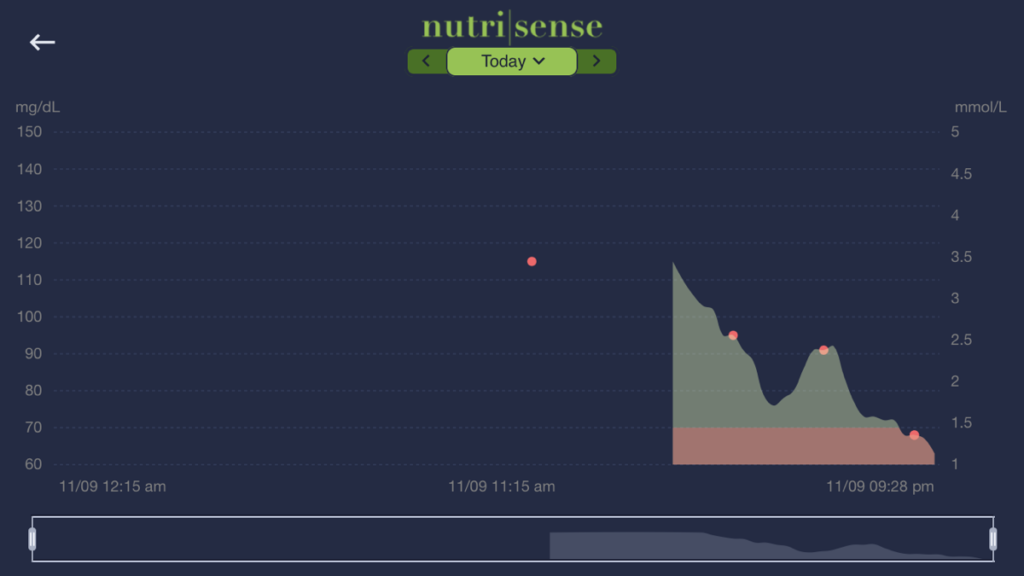
You really need to ignore the data that first comes in as the device is calibrating itself. Eventually it starts to figure you out and the data becomes meaningful.
It looks like it will read ketones also. I would love to get myself back into ketosis frankly. I’ve been eating zero carb since Monday morning (had coffee with maple syrup in it that morning. Remember I love maple syrup!)
But no carbs since then. I’m writing this Wednesday and I don’t believe there are any ketones yet. Will be interesting to see when they do show up.
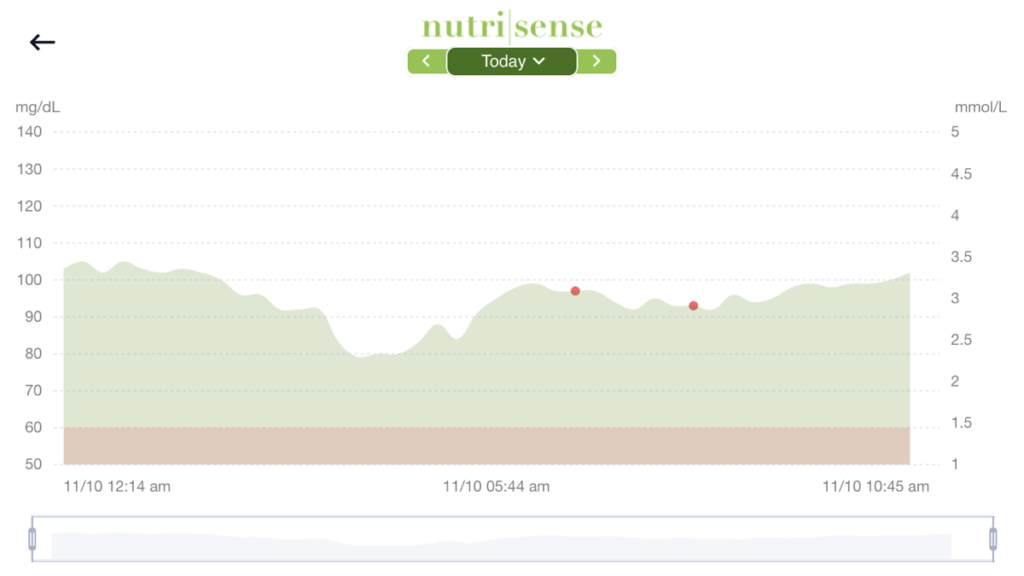
I also now have a full nights sleep worth of accurate data
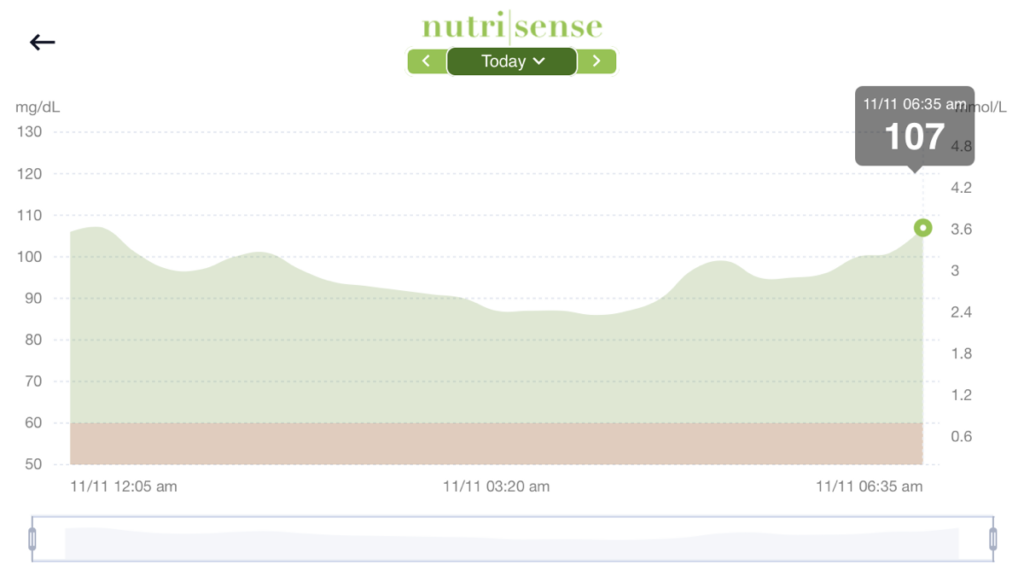
In the chart above, my glucose levels bottomed out at 4:00 am and then slowly worked their way up to a minor peak at 5:00 and then constantly increased to 6:35 when I woke up.
The body was getting me ready for the day!
The best part about all of this?
I love scanning my arm and using my phone as if I’m paying via apple pay at the grocery store. That ding is so satisfying. Then I get to dig into how my body reacts to food, exercise, and even alcohol.
I had a glass of wine Monday night and watched my glucose drop. I looked into it and alcohol will actually lower your blood glucose. I had no idea at the time. I do now.
Not completely sure what I’m going to fully get out of it, but so far has been a fun experiment.
Will keep you posted!
